240z LED Headlights
LED headlights are one of those upgrades you really need.
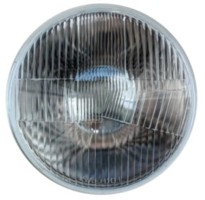 Modern LED headlights make a big difference compared to the stock halogen versions. They're much brighter and consume less power, which is great when you consider how badly Datsun designed the switch. More than one fuse block has melted due to corrosion there.
Some owners have gone for a "modern appearance" but I prefer the traditional style. The ones I bought are 7" diameter with the classic rounded lens. I got them from Vintage Car LEDs. I'm really happy with the way they look. There's a link at the bottom to take you to their page.
Unlike most of the other bulbs I found, these don't have an external ballast and I didn't have to modify the buckets. However... I had to ever-so-slightly modify the bulb. It wasn't difficult, it wasn't expensive, it didn't affect the performance, but it enabled a stock-appearing bulb to fit perfectly.
That's the kind of thing you'll see over and over in this site - making modern stuff work in an old car at a bargain price. This is no exception.
The 240z headlight bucket design is a little odd, so if you've never changed a bulb, here's a handy procedure.
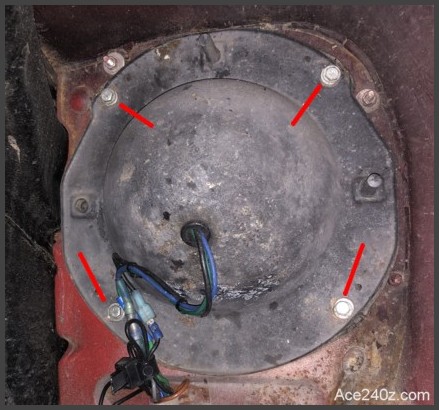 Start by jacking up one side and remove the wheel. You can do the swap without taking off the wheel but I think it's far easier without the wheel because you'll have better access to the buckets.
Nissan used Phillips-head screws to hold them to the body, and they're probably rusted and filthy so give 'em a good spray with some penetrant. Mine were replaced with bolts when I did my restoration, so they came out pretty easily.
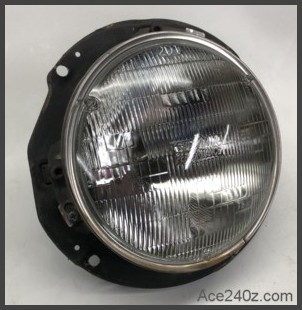 Here's how it looks on the workbench. The chrome ring is held in place with three little screws.
If your bucket is rusty, here's your chance to give it a scrub and a quick coat of paint.
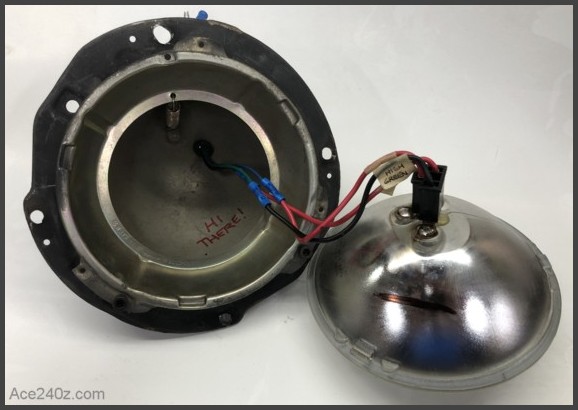 When the screws holding the chrome ring are removed, the bulb lifts right out. My wiring isn't stock, so the colors will be different for yours, and you won't have the crimped splices. During the original restoration I added little tags to identify the wires for any future work.
You definitely won't have the little "Hi There" note I added to give the next owner a laugh.
The black plug comes off with a little tug.
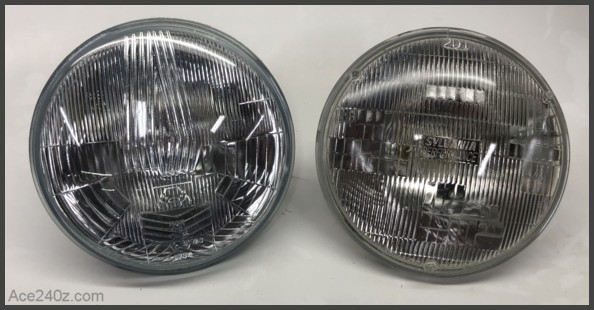 Old bulb on the right and new one on the left. On the outside they look pretty identical.
There's a lot of variation with LED headlights. Some have multiple bulbs, others have rings, some look like monster's eyes in a horror film. The options are endless.
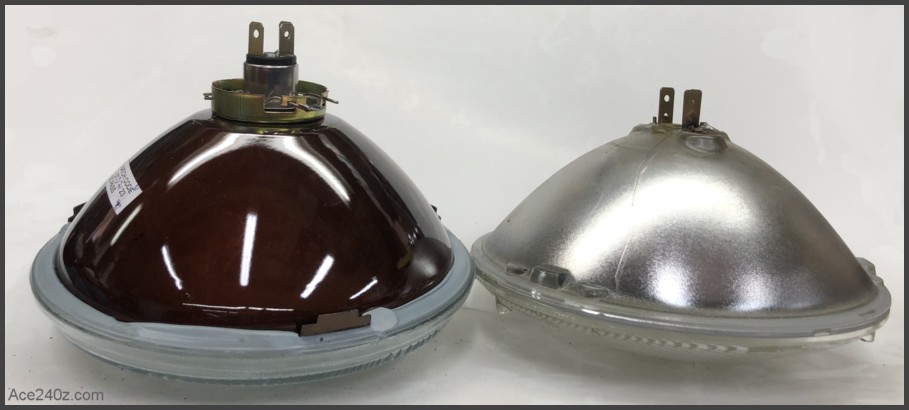 The new bulbs are a little taller so the stock plug prevents them from fitting all the way into the bucket. Vintage Car LEDs has the same diameter bulbs with a flat lens, which work fine with the stock plug without any modification, but as I mentioned above, I wanted the curved lenses.
Some people have cut holes in the back of their buckets to make room for the ballasts that came with their bulbs. Online I found longer buckets that had been 3D printed but they weren't cheap.
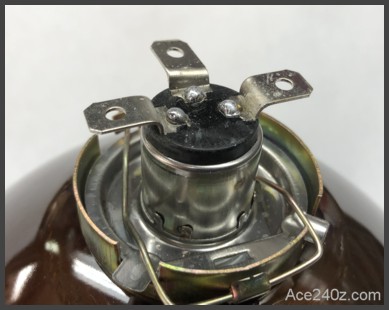 My solution was to bend the terminals. The metal is soft enough that you can do it with your fingers and took less than a minute to bend all three. Doing that probably voids the warranty, and the terminals might break off (mine didn't), so it's your choice. Take it slow and easy.
My '71 Z is 54 years old so I've had to do a lot of adaptations over the years. You've probably done a few as well.
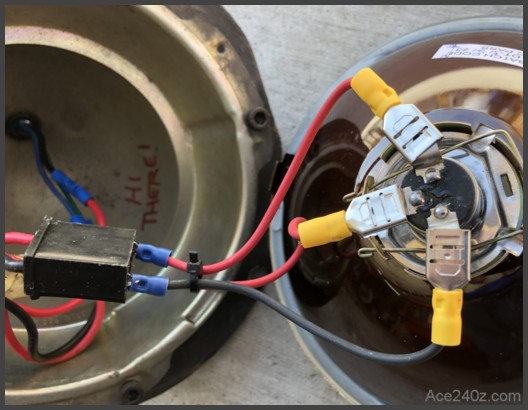 A set of little jumper wires are a simple fix. The headlight terminals are 5/16" wide, which means a "standard" female crimp connector won't fit. Amazon sells a set of 3/8" connectors that are perfect. They're typically used for 220v clothes dryers. At just $9 for a bag of ten (and free delivery) they're a cheap solution and only took a few minutes to assemble.
Make 6 jumpers using pieces of wire about 5" long. Attach the 3/8" female connectors at one end and standard male connectors at the other.
It was easy to figure out where the wires go into the plug and a zip-tie kept them snug & neat.
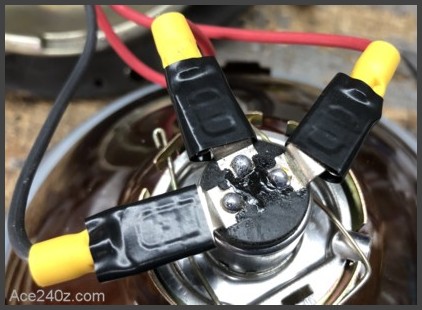 The last step was to wrap a piece of electrical tape around the connectors as insulation. I don't think they actually touch the bucket, but better safe than sorry.
Reassembly was easy.
There are two screws on the sides of the bucket which are used to adjust the direction of the beams. Yours are probably rusty, so use a little spritz of WD40 to loosen them up.
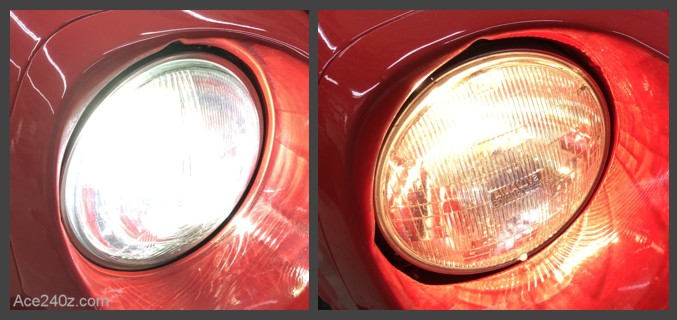 The new lights make a big, big difference.
Like everything on a vintage car, it took some fussing and fiddling, but it was relatively easy to do and well worth it.
I love it.
With everything tight and snug, it's time to adjust the beams. The bulbs came with a really handy guide. Click here for a printable PDF. You'll need a long Phillips screwdriver to make the adjustments and the screws are a little difficult to see when the lights are on. The ones on the sides move the bulb left and right. The ones at the top move it up and down. When I did my original restoration, I used Allen-head screws instead of Phillips-heads and they work better because the key can't slip out like a screwdriver. That's it. Enjoy being able to see the road better.
