Moustache Bar Bushings
That "clunk" in the rear might mean you need new moustache bar bushings
This is one of the most common replacements for a Z because the rubber bushings rot over time, leading to a very distinctive "clunk". Unfortunately, nobody makes the stock bushings any longer, which is a shame. Polyurethane replacements are available, but they don't provide the type of flexibility Datsun intended to isolate and support the differential. The moustache bar itself has some flexibility but the rubber helps prevent noise and vibration from reaching the cabin. Polyurethane bushings can't do that because they have zero flexibility. If you don't already have a copy of the Factory Service Manual, you can download a free PDF copy here for a free pdf version.
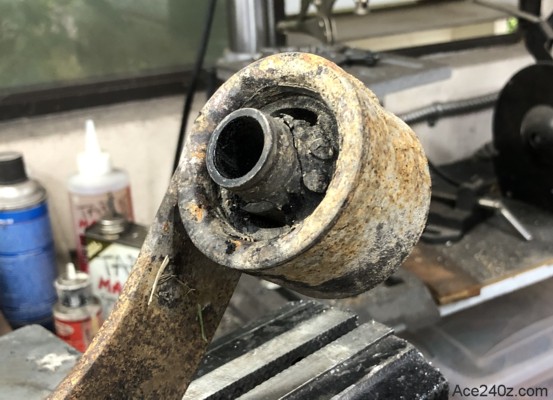 Here's what a badly worn bushing looks like. 54 years has not been kind.
In order to get the replacement bushings to fit, you need to remove the rubber and the easiest way is to burn it out.
Here's what a badly worn bushing looks like. 54 years has not been kind.
In order to get the replacement bushings to fit, you need to remove the rubber and the easiest way is to burn it out.
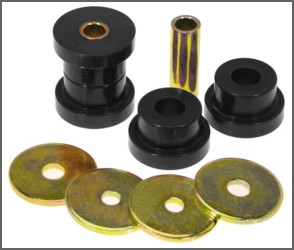 The first thing to do is buy a set of new bushings in advance. There are only a couple of manufacturers but the retail prices and shipping costs vary quite a bit, so do some shopping and save a few bucks.
 Next is removing the bar itself, which is a major PITA, but I'm not going to go into the entire procedure.
In this photo you can see the bar, which is attached to the back of the differential. At each end it attaches to the body. Unbolting the ends is easy. Getting it off the differential and down between the rear attachment brackets is a real bitch.
Look online to see how others have done it.
Next is removing the bar itself, which is a major PITA, but I'm not going to go into the entire procedure.
In this photo you can see the bar, which is attached to the back of the differential. At each end it attaches to the body. Unbolting the ends is easy. Getting it off the differential and down between the rear attachment brackets is a real bitch.
Look online to see how others have done it.
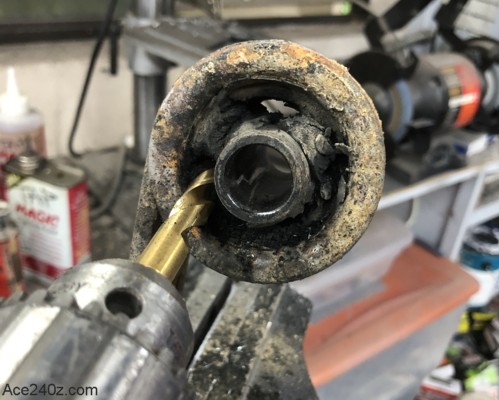 With the bar secured in a vice, start with a drill and make as many holes in the rubber as you can.
The objective is to get the steel tube out of the way of the torch.
With the bar secured in a vice, start with a drill and make as many holes in the rubber as you can.
The objective is to get the steel tube out of the way of the torch.
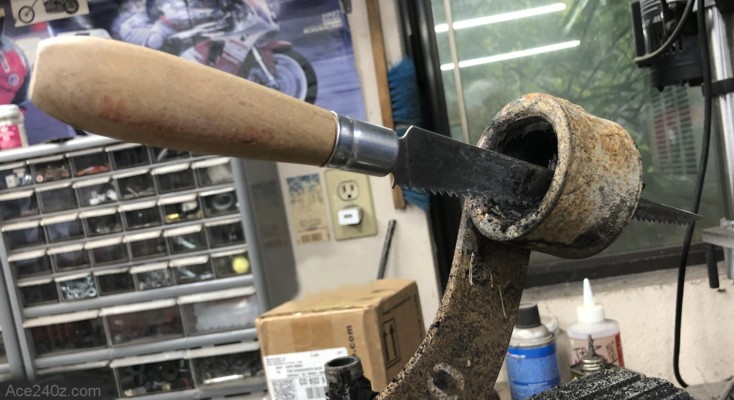 Use a small saw to cut thru it and pull out the steel tube. This cheap little saw is for drywall and gets used for all sorts of things.
Use a wood rasp, or anything similar, to remove as much rubber as possible. The less rubber remaining in the moustache bar means the less rubber you need to burn.
Use a small saw to cut thru it and pull out the steel tube. This cheap little saw is for drywall and gets used for all sorts of things.
Use a wood rasp, or anything similar, to remove as much rubber as possible. The less rubber remaining in the moustache bar means the less rubber you need to burn.
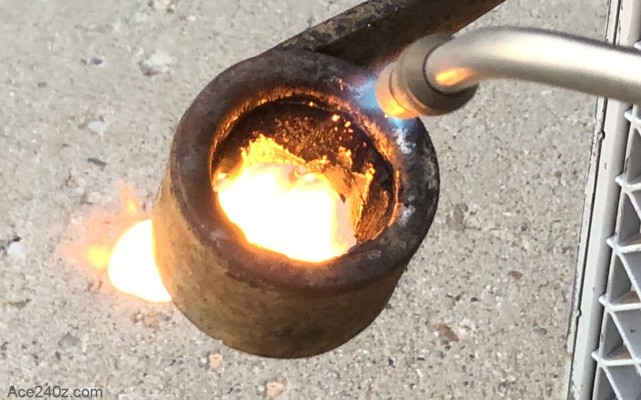 Here's the fun part.
Prop the bar on a crate or bricks or axle stands in a well-ventilated place. You don't want to breathe in the smoke. Use a propane torch or welding torch to set the rubber on fire. I found that it wouldn't stay lit on its own for very long, so I had to keep hitting it with the torch. Flip the bar upside-down to get as much as possible.
When you're done, use the saw or rasp again to clean out the burned rubber. You'll probably have to use the torch again because the rubber is pretty tough to destroy. You don't need to get out every last scrap – just enough to be able to push the replacement bushings inside.
Here's the fun part.
Prop the bar on a crate or bricks or axle stands in a well-ventilated place. You don't want to breathe in the smoke. Use a propane torch or welding torch to set the rubber on fire. I found that it wouldn't stay lit on its own for very long, so I had to keep hitting it with the torch. Flip the bar upside-down to get as much as possible.
When you're done, use the saw or rasp again to clean out the burned rubber. You'll probably have to use the torch again because the rubber is pretty tough to destroy. You don't need to get out every last scrap – just enough to be able to push the replacement bushings inside.
 You can insert the new bushings now but taking a few minutes with a wire brush to get rid of the dirt, followed by a few coats of rattle can paint, makes it look better.
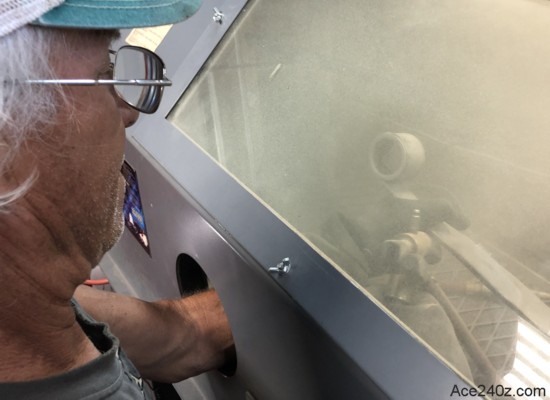
My friend Nick has a big sandblasting cabinet and was nice enough to clean it down to bare metal.
You can insert the new bushings now but taking a few minutes with a wire brush to get rid of the dirt, followed by a few coats of rattle can paint, makes it look better.
My friend Nick has a big sandblasting cabinet and was nice enough to clean it down to bare metal.

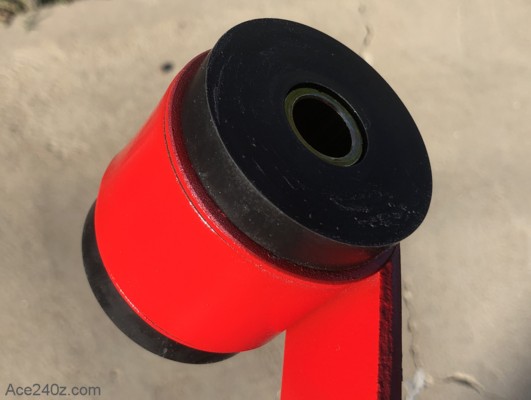 I had previously painted all of the rear suspension red in a goofy way to make it look like "aftermarket parts", so the moustache bar was painted to match. One coat of primer and 3 coats of red did the trick.
The bushings went in, followed by the steel tube. It looks beautiful and is ready to reinstall, which is gonna be a royal bitch.
I had previously painted all of the rear suspension red in a goofy way to make it look like "aftermarket parts", so the moustache bar was painted to match. One coat of primer and 3 coats of red did the trick.
The bushings went in, followed by the steel tube. It looks beautiful and is ready to reinstall, which is gonna be a royal bitch.