240z Electrical
Few things are as frustrating as working on the electrical system.
Most people absolutely hate working on a car's electrical system. It can be frustrating, confusing and sometimes downright impossible to figure out. It doesn't have to be that way. If you have a few simple, low-cost tools, a copy of the wiring diagram, and a little patience, you can find the problems and fix them for far less than it would cost for a mechanic... if you can find a mechanic or electrical specialist who's willing to work on older cars.
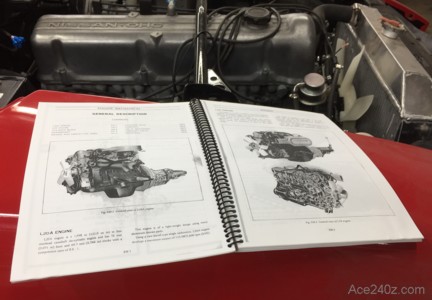 Before doing anything, get the genuine Datsun Factory Service Manual. Click here for a free pdf version.
Aftermarket books, like from Chilton or Haynes are okay, but the factory manual has better pictures and diagrams and is specific for your car's year.
You can buy an original printed copy on eBay but they tend to be beat-up and expensive. Take your PDF to someplace like Kinko's. Print the entire thing double-sided, then get it spiral-bound. With a spiral bind it'll lay down flat instead of having to be propped up like a regular book. It's well worth a couple extra dollars.
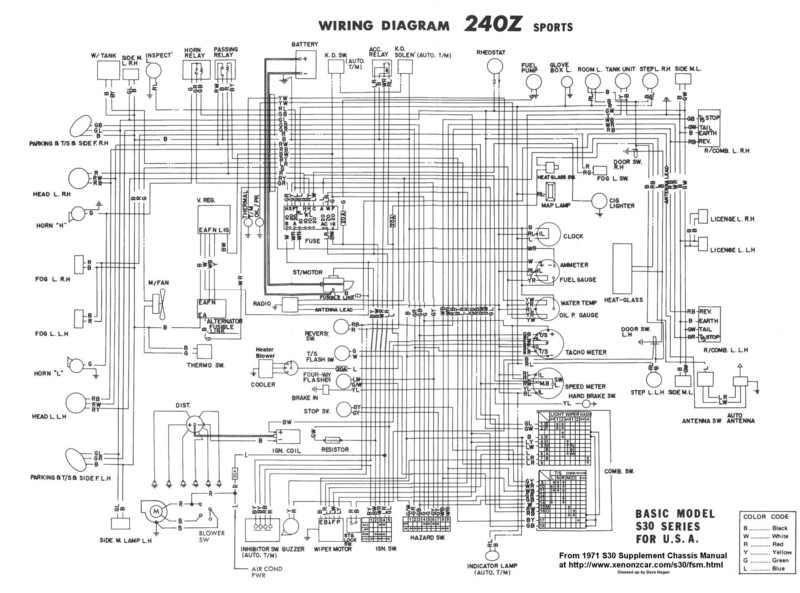 I think the Datsun wiring diagram looks awful. I work as a CAD drafter and have done electrical drawings of all sorts, so I know they could have done much better. The diagram here is a cleaned-up copy that's easier to read thanks to Dave Hogan.
Click on it to download a pdf copy.
While you're at Kinko's, have them print this diagram on an 18" x 22" sheet of paper. Maybe get one of two extras for backups.
The next step is buying a couple of different colored highlighters.
When you get home, tape that diagram to a piece of cardboard.
You now have an easy-to-read and easy-to-trace diagram that will help you track down your problem.
The factory manual also has several diagrams which show the type of connectors they used, as well as the wire colors. It's not as essential as the wiring diagram itself, but can make tracing a little easier, so maybe print a few large copies of them as an extra reference.
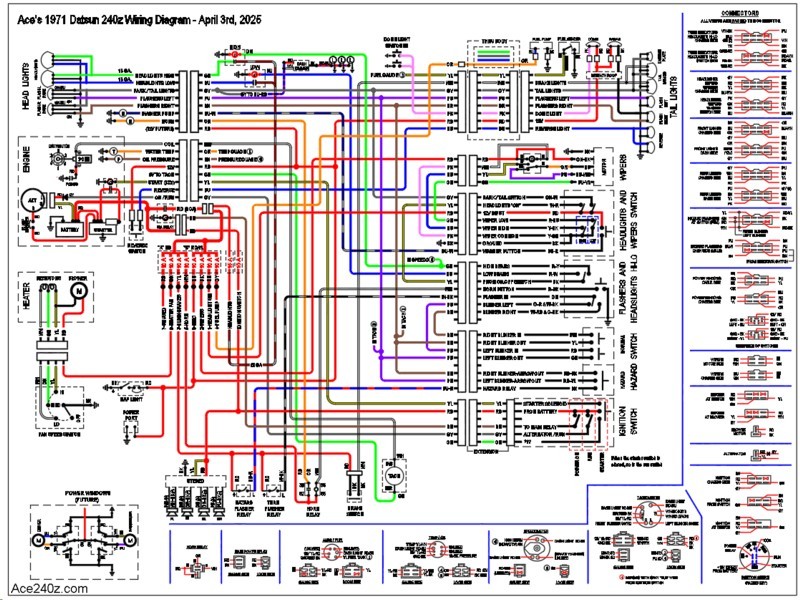 Here's what a good wiring diagram looks like. Click on it to download a pdf copy.
When I rewired my car, I didn't follow the same style as Datsun. In America and in Europe, power comes from the battery to a switch, then to the device, and finally to ground. Datsun did the reverse: power goes to the device, then to the switch, and finally to ground. It accomplishes the same thing but I wanted my car to follow the American style.
Because my wiring is different, I needed to keep track of how everything worked. As I mentioned before, I draw for a living so this was fairly simple, and most of all, easy to update when things changed and more stuff was added. Whoever owns the car after me will have a 100% accurate diagram.
Another difference is the wire colors. Most of their wires were a basic color, such as green, but they often added a white or red stripe to give them a little flexibility. Unfortunately, with an 50-year-old car, the colors can fade a little, making it a little difficult to figure out some of the stripes. Is it white, or yellow, and so on. I eliminated that by using just eight colors, which worked out fine.
With their diagram, they tried to use a single letter to indicate solid colors, but with black and blue wires they couldn't use the same "B", so for blue they used "L" which is confusing. I used two-letter combinations which makes it very clear, and even better, the wires themselves on the diagram show the color.
If all of that's not enough, mine shows the back of all the guages, the ignition switch, and the colors for every connector. There are also a few extra things, such as the electrical fuel pump and the stereo speakers, as well as the future dash cam and radar detector and power windows. No telling what might get added in the future, but I'm ready for it.
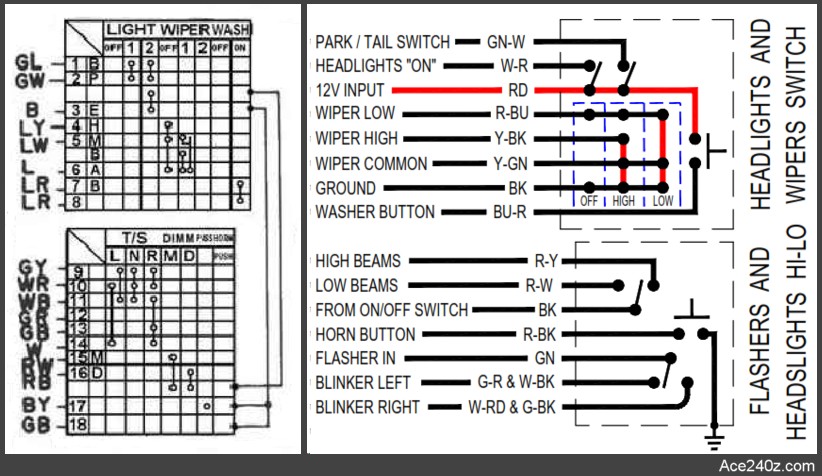 Most of my diagram won't apply to your car, but some of the things such as how the switches work, are far easier to understand on mine.
As an example, on the left is their "matrix" for the headlights, wipers and turn signals. It's damn confusing.
Mine is on the right and easy to read. The wires coming from the switch to the connector are labelled with the factory colors and show exactly where they go. Too bad I wasn't around back in 1970 to show them how it's done.
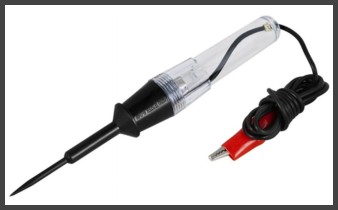 The tools are basic and cheap. Each of these can be found on eBay for under $10 with free shipping.
First is a simple continuity tester. Attach the clip to a ground, then poke around with the tip. If power is present, the bulb inside the tester lights up. A good example is an ordinary switch - does it actually work? This makes it easy to find out.
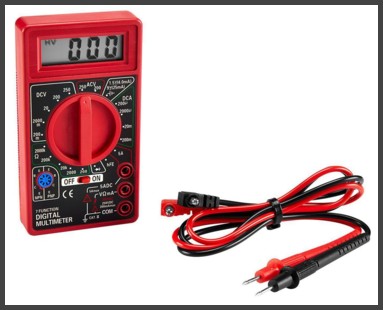 This is a multi-function test meter that lets you measure voltage and continuity and resistance and a lot more. It's easier to use than it looks and is essential for tracing problems.
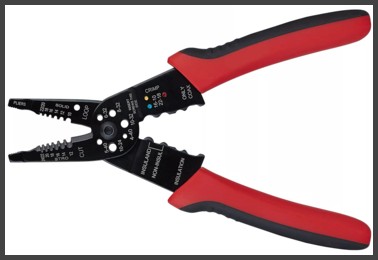 A combined wire stripper & terminal crimper is great. You'll occasionally need to cut wires, strip off the insulation, and attach different types of crimp-on terminals and connectors, and one like this does it all.
And so, armed with those basic tools, the large print of the factory wiring diagram, and a couple of highlighters you can trace every circuit from end to end. Take it slow and be patient. Mark off each circuit as you go to reduce the chance of getting confused. Is the problem it a failed switch? Is something missing the ground connection? Is the fuse burned out and you somehow missed that? Is a connector broken? You can do it.
If you're more advanced (or braver) than most people, here's an amazing resource. Datsun used three separate wiring harnesses for the engine, the body (such as the lights) and under the dash, and they made small changes as the car evolved, which can make tracing circuits very difficult, especially if the harness has been changed or damaged or hacked over the years. This page shows the difference between the harnesses, as well as where each wire goes. Click here .
 And finally, if you ever need replacement connectors, go to Oregon Motorcycle Parts.
They specialize in replacement electronics for just about every motorcycle, but they also have every OEM connector you'll find on a Z. When I rewired mine from scratch, every connector came from them, and their prices can't be beat. I don't go anywhere else.